
 by
by Spis treści
On May 19, the long-awaited annual Maniacs Patch update finally arrived – and for good reason, the new version brought even more new features and changes. Changes so big that BingShan had to rewrite parts of Maker’s systems to allow for further development. Unfortunately, this also opened the door to potential compatibility issues. The author himself clearly emphasizes the importance of creating backups of your project, as the new version is somewhat experimental and was released to identify unforeseen bugs.
The first launch might cause some confusion, as new and changed features won’t be visible in the command insertion window. For now, the changes have only been implemented in the program’s engine, and clickable options will take some more time to appear. So how can the new functionalities be used in the meantime? Fortunately, the answer is simple – using TPC.
TPC
More specifically, TkoolPartialCompiler, is a program also created by BingShan, designed to speed up and streamline eventing for more advanced 2k3 users. The application translates an intermediary language into commands understandable by the game engine. TPC is a powerful tool – it allows for modifying command settings that the editor (for now) does not support. I highly recommend it to anyone with even a basic grasp of programming.
Okay, but how can this be used for the new commands? Well, this version introduces integration of the editor with TPC by adding two new options available when inserting a command. However, before that, you need to download the program from the author’s website…
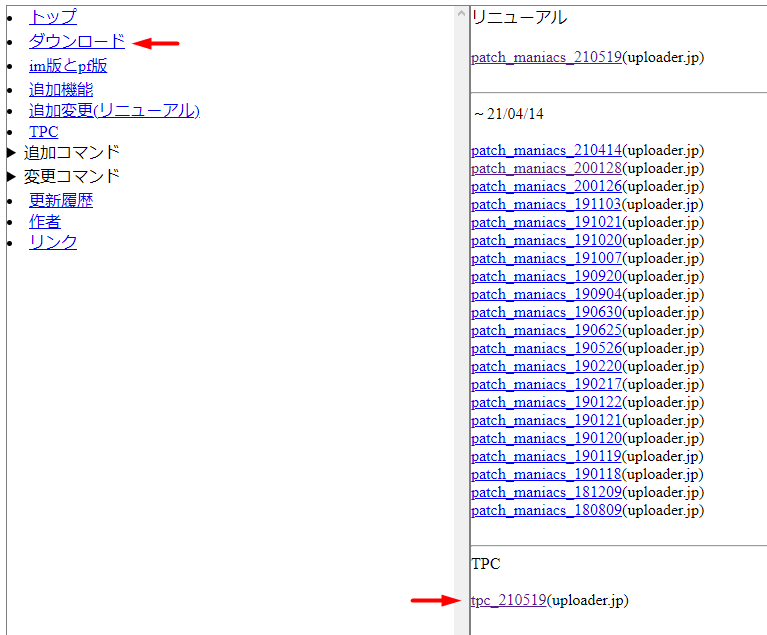
…and then place it in the folder where the patched editor’s .exe file is located. For users of the Steam version, the folder path should resemble the one shown in the screenshot below.
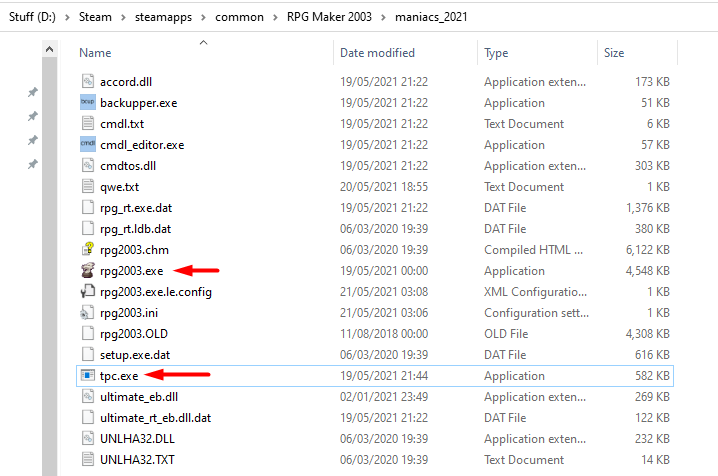
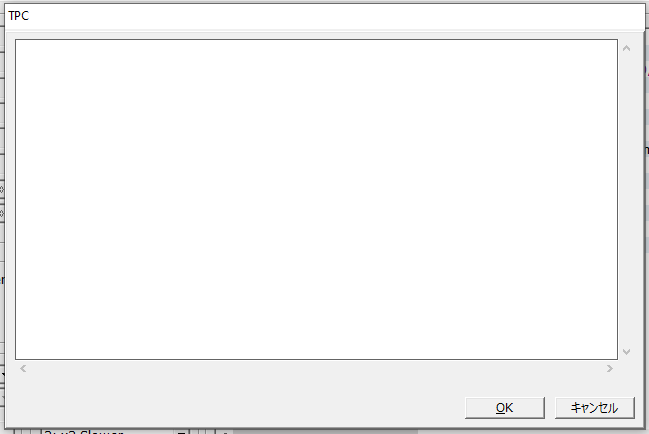
If you made these changes while the maker was open, you need to close and reopen it. Voilà! From now on, clicking Create with TPC and Edit with TPC should open a large, blank TPC window where you can enter commands.
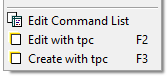
Hold on, Axer, does this mean I have to learn programming? Not at all – the lion’s share of the new features can be implemented simply by copying the text straight into the TPC window and possibly changing the clearly described parameters. Additionally, I’ll try to include a screenshot showing an example of its usage in the descriptions. We’ll start with the most significant (at least in my opinion) and useful functionalities, so first up is…
Refreshed debugger
Yes, ladies and gentlemen, at last! The debugger has undergone a solid facelift and, in addition to displaying itself in a new window, it has been enhanced with detailed information about events on the current map, even including images! A true lifesaver for anyone working on more advanced systems.
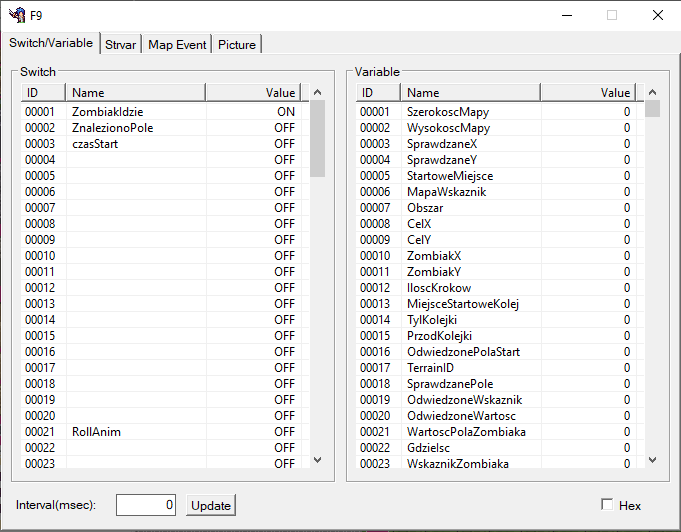
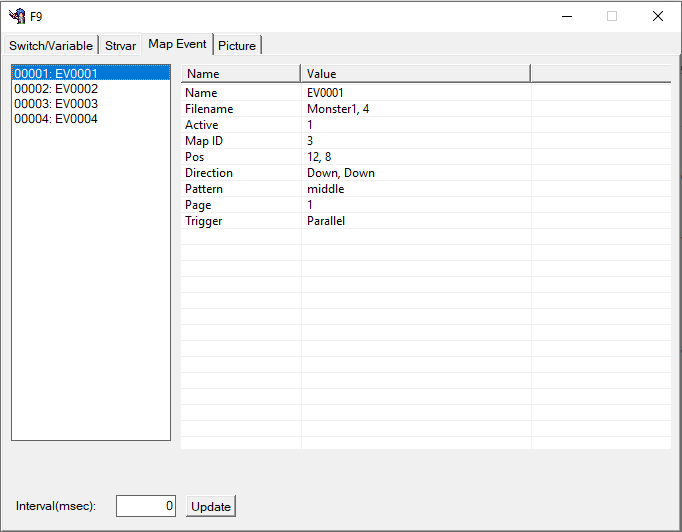
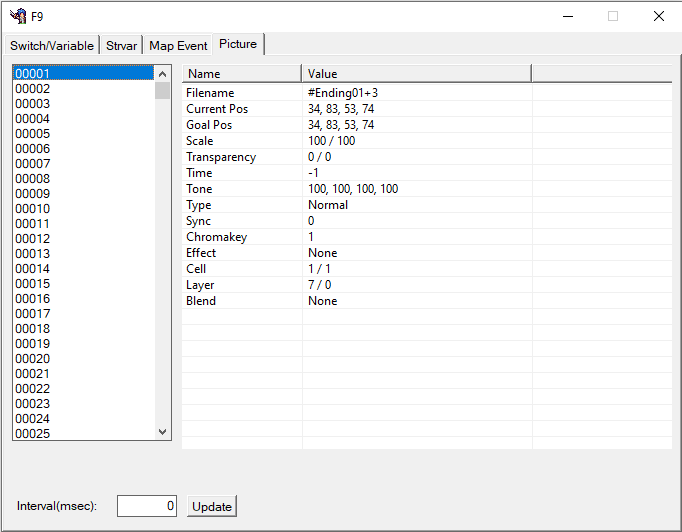
Those more observant have probably noticed that I skipped the second tab bearing the mysterious name Strvar. It contains information about a new type of variables, namely…
String variables
A feature that opens the gateway to creating things previously impossible or incredibly difficult: configuration files, accessible support for multiple language versions, text input interpretation systems, and much, much more! Not only that, BingShan has equipped string variables with a wide range of various manipulations. Buckle up, because there’s a lot to cover!
String variables are referred to similarly to ordinary variables – since for numeric variables in text we use \v[number], string variables use \t[number] in the same way. When constructing commands through TPC, the process is nearly identical, except you omit the backslash. With this knowledge, we can now learn the basic operators:
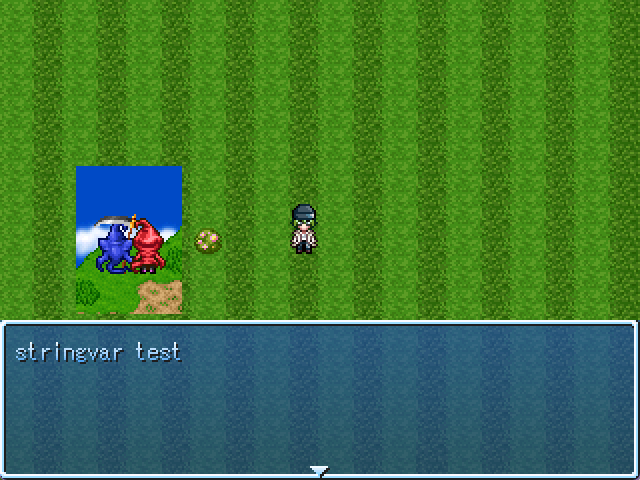
- .asg „text” – basic assignment of text to a variable. For example, to assign the text „variable test” to a string variable number 1, you need to right-click in the desired place and choose Create with tpc, then in the TPC window type the following command and press OK. Notice that the entered command is already displayed in a less cryptic form. After this, you can trigger a message window with the content „\t[1]” to test its functionality. The .asg command can assign many different values, as explained further below.
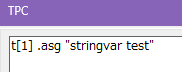

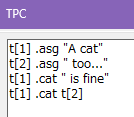
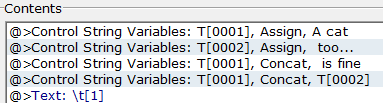
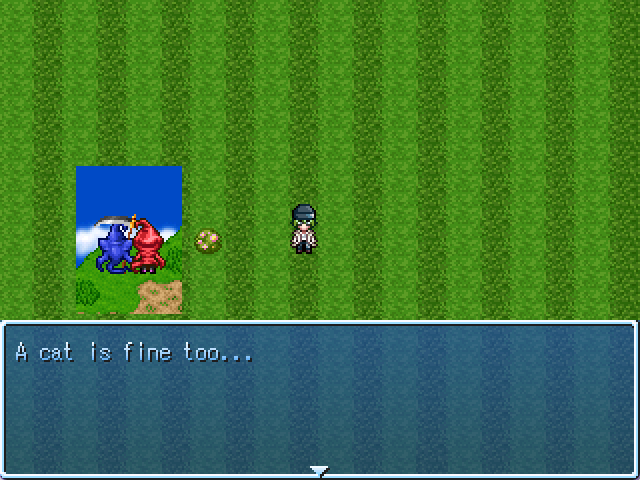
- .cat „text1”, t[number], „text2” … – appends one or more texts at the end of another. The texts can be provided as „hardcoded” strings or by referencing other text variables.
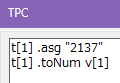
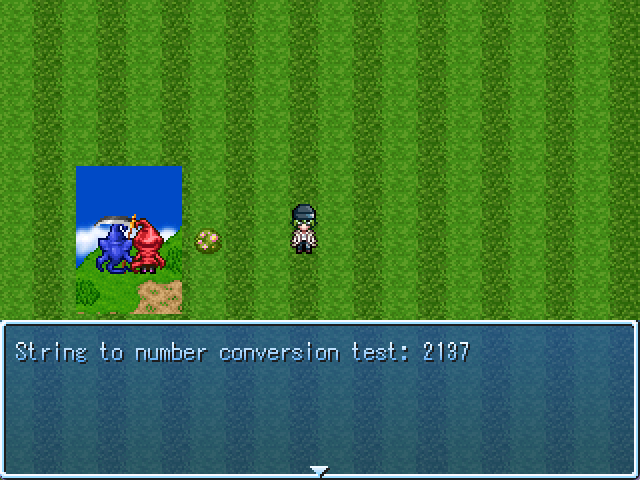
- .toNum v[number] – converts text to a number and assigns it to the number variable. If this is not possible, e.g. when the text does not consist only of digits, 0 goes to the number variable. If there are several numbers separated by spaces in the text, only the first one is taken.

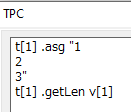
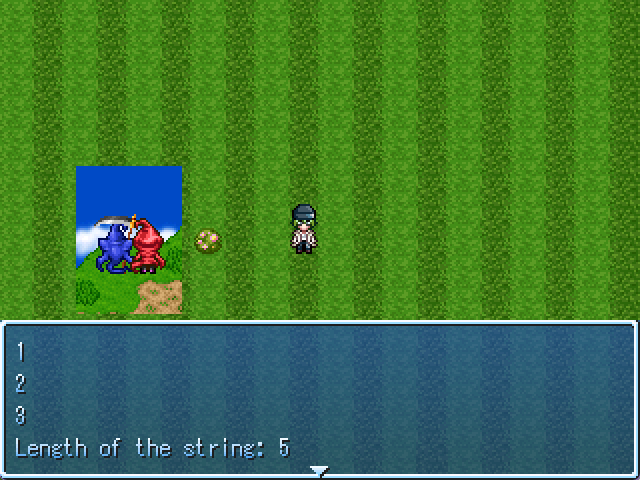
- .getLen v[number] – assigns to the number variable the number of characters in the text, including whitespace characters (space and enter).

- .inStr „string”, v[number], beg X – finds a given string in the text, starting from position X, and stores its position in variable number. If such a string is not in the text, -1 goes to the number variable. If the string occurs more than once, the position of the first occurrence is returned. Note: the position is counted from 0, i.e. the first letter of the text has a position of 0, the second 1, and so on. The beg parameter is optional and can be omitted, it will add itself automatically.
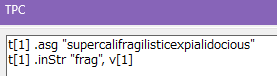

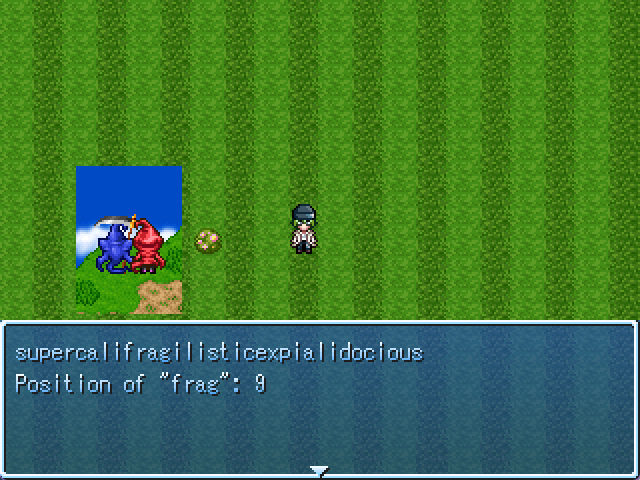
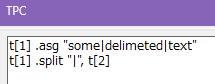
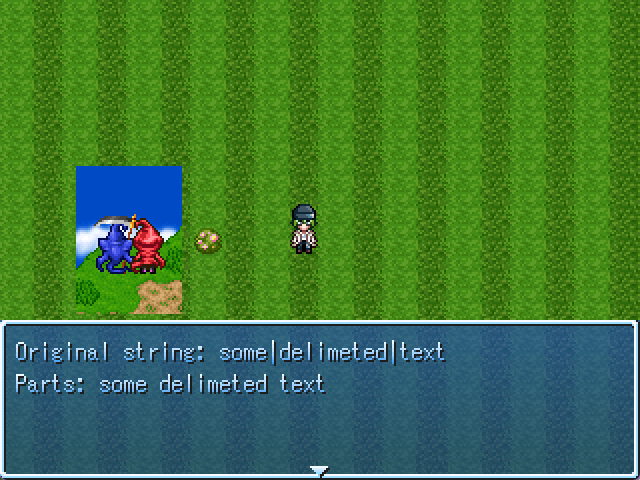
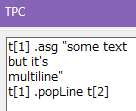
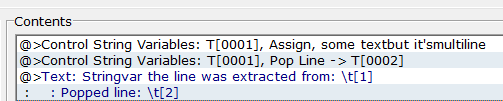
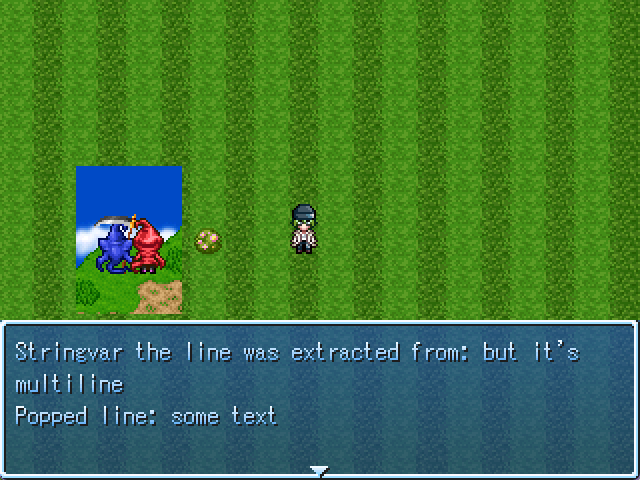
- .split „string”, t[number], v[otherNumber] – splits the text into smaller parts according to the character/character string we specify and puts them into string variables starting from number, up to a maximum of otherNumber part. Specifying the number is optional, by default all parts of the cut text will go to the string variables. As you can see in the screenshots: we specified that the parts of the text start from t[2], so the first part will go to t[2], the next to t[3], the next to t[4], and so on.

- .popLine t[number] – extracts and deletes the first line of text and inserts it into number. Useful when reading, for example, a configuration file.
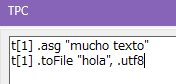
- .toFile „file”, .utf8 – writes the contents of the string variable to the specified file in the Text folder, in the selected encoding (if you don’t know what it’s about, just leave .utf8). If a file with given name does not exist, it will be created. It is different for the Text folder though, you need to create it in the project directory beforehand. Note: if the file already exists, the command overwrites all its contents.

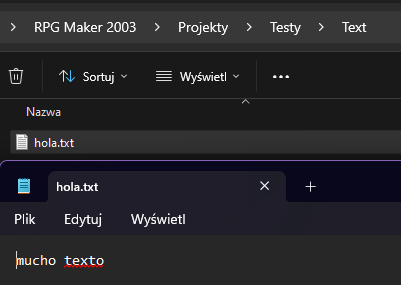
In addition to all this, the .asg operator has several additional tools at its disposal:
- referencing numeric variables and switches – a string variable can be assigned the value of some numeric variable (automatically converted to text) or a switch (to text „ON” or „OFF”) using v[] and s[], respectively.
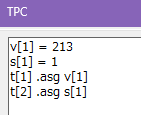
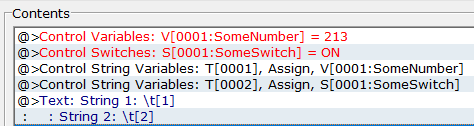
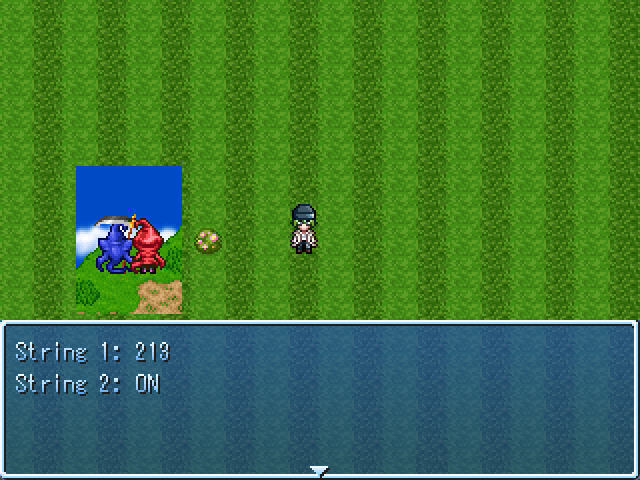
- extracting names from the database – most of the significanct ones:
- .actor[ID] .name – name of the hero
- .skill[ID] .name – name of the skill
- .item[ID] .name – name of the item
- .enemy[ID] .name – name of the enemy
- .troop[ID] .name – name of the group of enemies
- .terrain[ID] .name – name of the terrain
- .element[ID] .name – name of attribute (element)
- .state[ID] .name – name of the state
- .anim[ID] .name – name of the attack animation
- .tileset[ID] .name – name of the tileset
- .s[ID] .name – name of the switch
- .v[ID] .name – name of the numeric variable
- .t[ID] .name – name of the string variable
- .cev[ID] .name – name of the common event
- .class[ID] .name – name of the class
- .anim2[ID] .name – name of the hero’s battle animation
- .map[ID] .name – name of the map
- .mev[ID] .name – name of the event on the map
- .member[N] .name – name of the Nth hero in the team
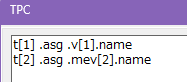

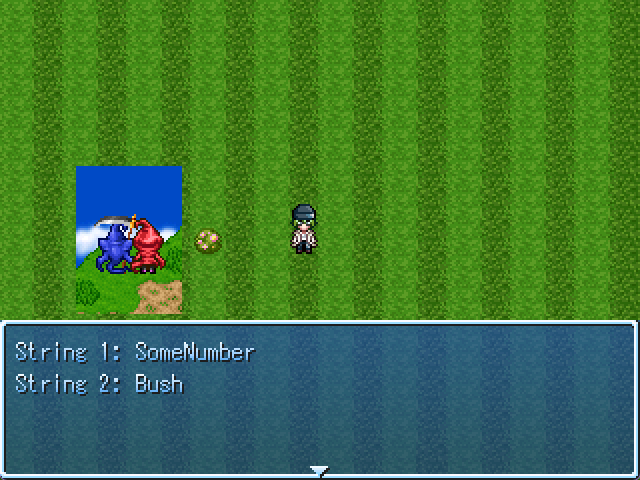
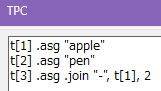
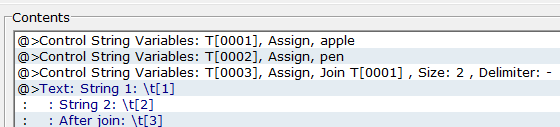
- .join „glue”, t[number] / v[number], X – joins X consecutive text or numeric variables (starting with number) into one and inserts the selected string between them.
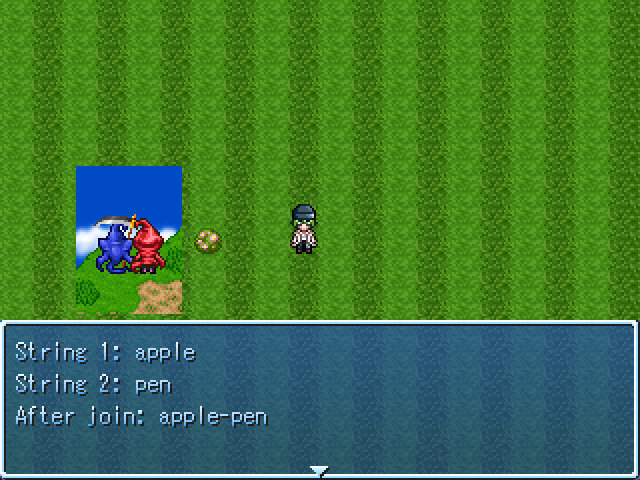
- .ins T1, X, T2 – inserts a different character or text T2 in place of X (counting from 0) in the text T1. X can be a regular number or a variable, while T1 and T2 can either be regular text or string variables.
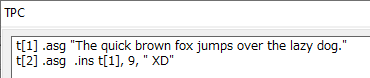

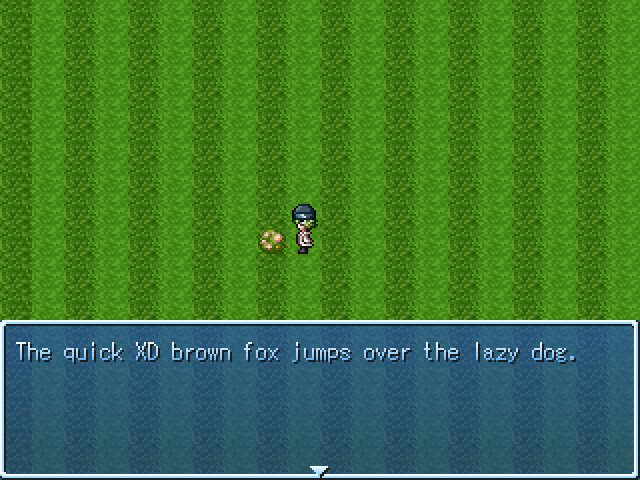
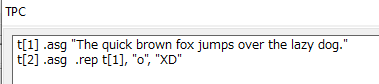
- .rep T1, T2, T3 – replaces all occurrences of T2 with T3 in the text T1. T1, T2, and T3 can be either regular text or string variables.

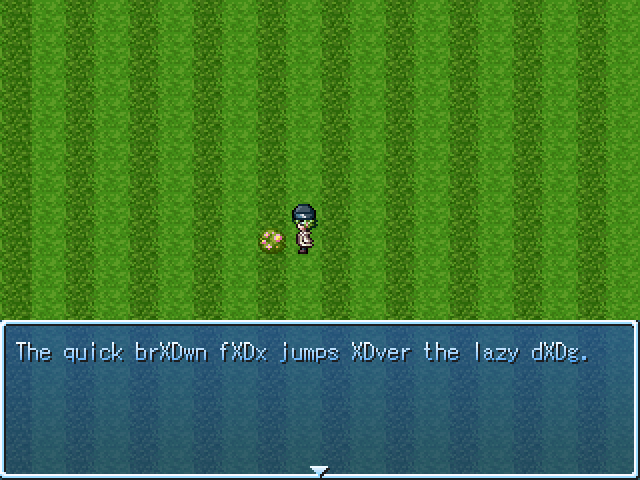
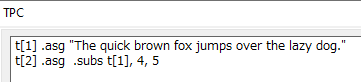
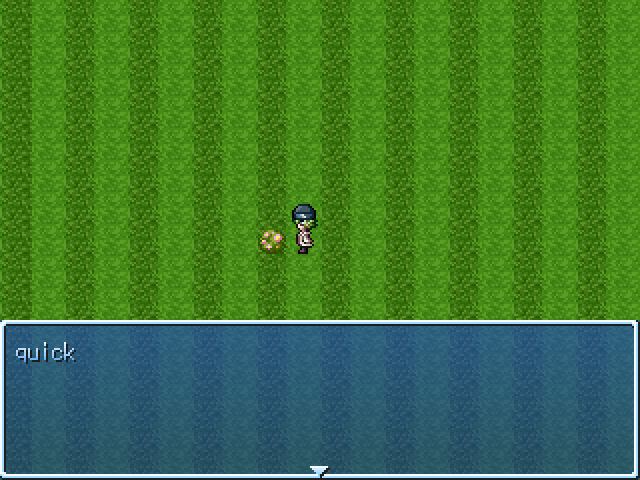
- .subs T1, X, Y – extracts a substring of Y characters from the text T1, starting at position X. X and Y can be regular numbers or variables, and T1 can be either regular text or a string variable.

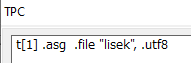
- .file „file”, .utf8 – loads the entire contents of a file in a given encoding into the variable (similar to .toFile, I recommend leaving .utf8). If the file does not exist, the variable becomes empty.

At first glance, it might seem complicated, but it’s actually quite the opposite. Alternatively, you can wait for the author to release a „clickable” version, which will simplify the entire process a bit. BingShan also didn’t forget about the possibility of creating conditions with text variables, but we’ll cover that shortly.
Changing the size and font of messages
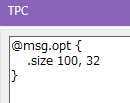
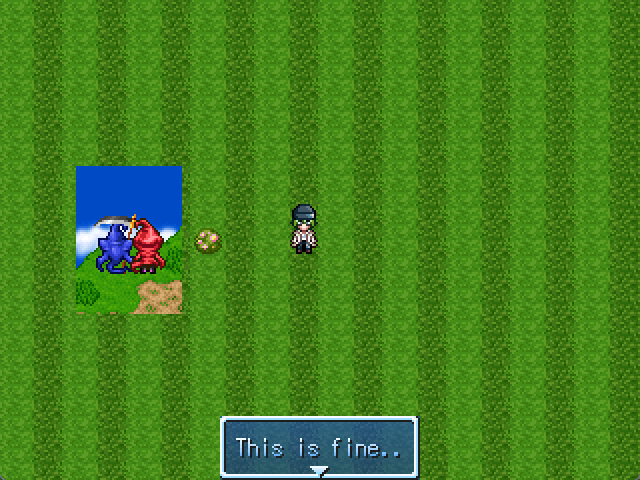
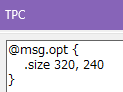
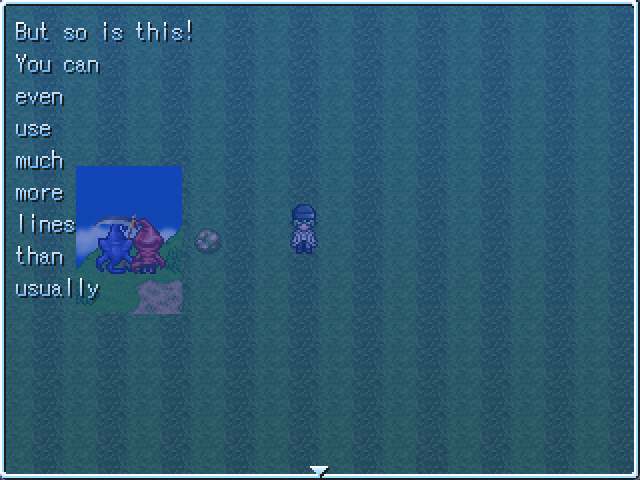
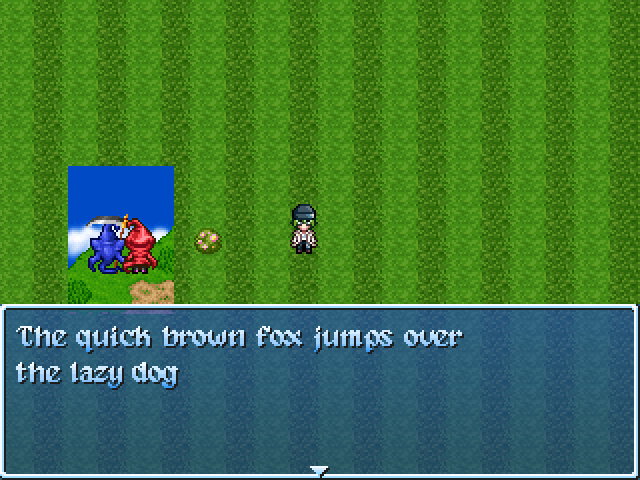
Basic messages have also received some interesting changes. The first of these is the ability to set the window size down to the pixel. Want a tiny message for a level-up text? No problem! Need a gigantic window to fit more than 4 lines of text? Absolutely!
@msg.opt {
.size X, Y – where X is the width and Y is the height of the window in pixels
}
Unfortunately, for now, there is no option to set the exact position where the window appears or to automatically adjust the window size to fit the text. However, BingShan strongly suggests that these features will be included in one of the upcoming updates.
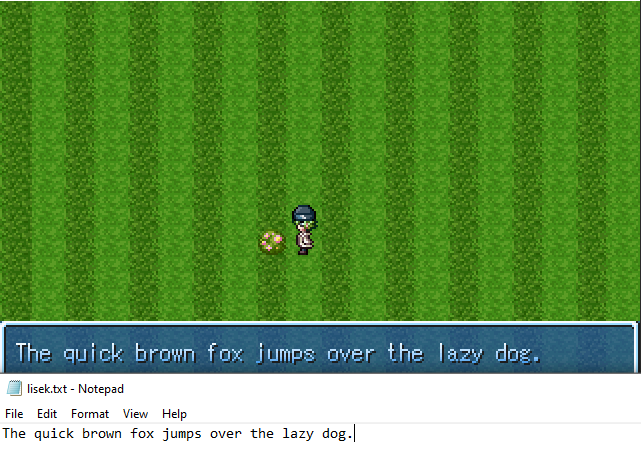
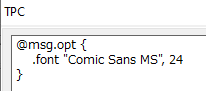
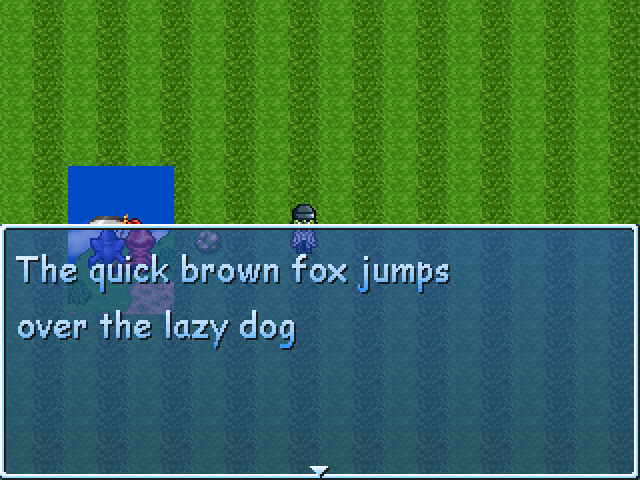
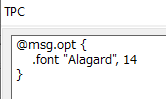
But it doesn’t stop there! Finally, you can change the font used for displaying messages on the fly, as well as its size. And the best part is – this font doesn’t need to be installed on the player’s system; you just need to place it in the Font folder within the game directory.
@msg.opt {
.font „ABC”, X – where ABC is the name of the font and X is its size in pixels
}
Currently, there are some issues with correctly coloring letters at font sizes around 30 pixels and larger, but otherwise it works flawlessly.
More accurate wait
Sometimes wait 0.0 is too short, and wait 0.1 is too long. To solve this, you now have the ability to set the wait time for an exact number of frames, which can be defined either as a fixed value or by using a variable:
- @wait X .frame – for a fixed number of X frames
- @wait v[number] .frame – for the number of frames specified by the variable number

Precise screen scrolling down to the pixel
Another long-awaited feature – this will definitely interest creators of advanced systems. It can be invaluable for creating things like: an intelligent camera, smoother scrolling in platformers, far-sight abilities in stealth games, or simply for more precise control over what the player can see.
-
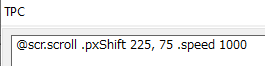
- @scr .scroll .pxShift X, Y .speed Z – shifts the screen by X pixels horizontally and Y pixels vertically at a speed of Z pixels per frame
- @scr .scroll .set X, Y .speed Z – moves the screen to a location with X and Y coordinates (in pixels) at a speed of 0.001*Z pixels per frame

Even more image options
We’ve been spoiled again! When it comes to displaying images, several, dare I say, revolutionary additions have been introduced:
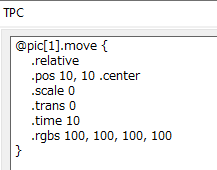
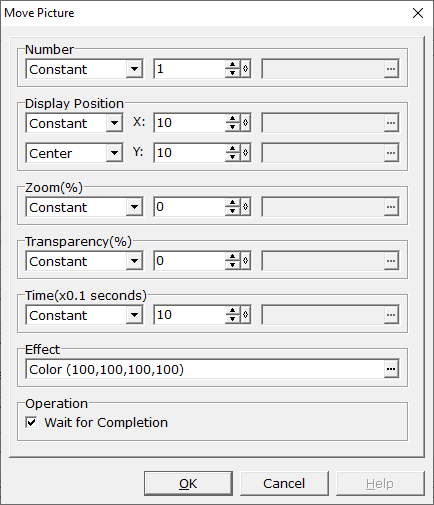
- relative Move Picture – allows to move an image relative to its current position, but not just that! It also applies to size and transparency. Additionally, you can specify which other parameters (such as color, effect, blend, etc.) to retain and which to change. To use this option, the easiest way is to create a Move Picture command in the event, specifying the number by which you want to change the parameters. Then, edit it using TPC and add .relative. To preserve the other parameters, you have the following operators at your disposal:
-
- .keepRgbs – keeps color
- .keepEffect – keeps effects like rotation, waving, etc.
- .keepBlend – retains settings for blending the image with the background (used for lighting effects)
- .keepTime – retains the movement’s remaining time (if you make several Move Picture in a row)
- .keepFlip – keeps the flip of the picture
-
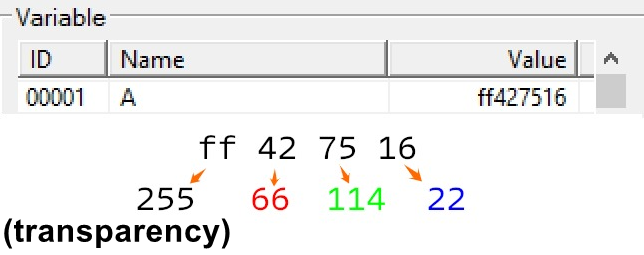
- @pic[ID].getInfo .pixel X, Y, W, H .dst v[number] – retrieves information about the color of pixels on the image ID within an area of size W by H, starting from the coordinates X and Y. The data is stored in variables starting from the specified number. The easiest way to read and display color information is by using the hexadecimal system. In this case, the pixel value stored in a variable will look as follows:
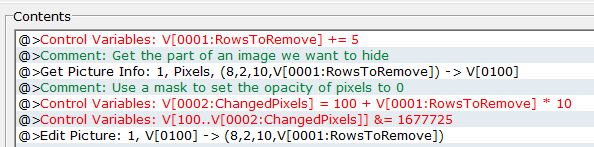
- @pic[ID].setPixel .xywh X, Y, W, H .src v[number] – probably the most interesting option. It works similarly to the one above, but instead of retrieving the values, it sets them. Yes, this means you can edit images on the fly! What’s even more exciting is that it works with transparency – this, combined with the option above, allows you to create things like health bars without the need to use dozens of images.
- @img.save.screen.dst „FILE” – saves the game screen to a .png FILE
- @img.save.pic ID .dst „FILE” – saves an image with a given ID to a .png FILE in the game directory
Extended Conditional Branch
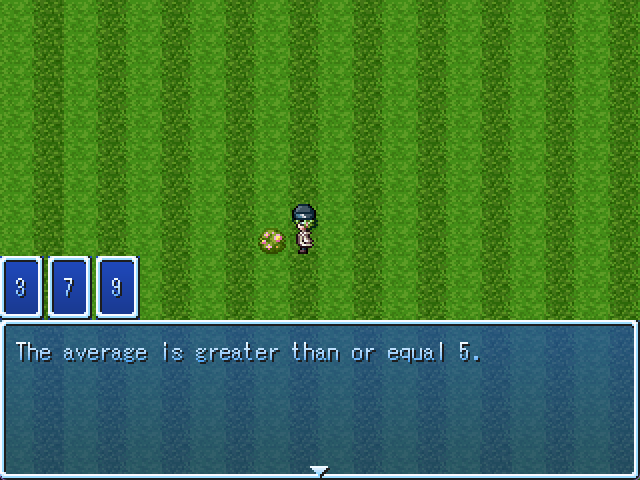
Creating conditions in RM can be quite primitive and, at times, frustrating. Often, you need to create temporary variables that won’t even be used after the Conditional Branch. By using TPC, we can extend these conditions with the capabilities of Expression from the Maniacs Control Variables. To do this, we use the @if` operator (yes, with the backtick, that „little thing”). If you’re unfamiliar with what Expression is or how to use it, I recommend reading the section of the guide written by Soul, where he covers this and other aspects of the new Control Variables.
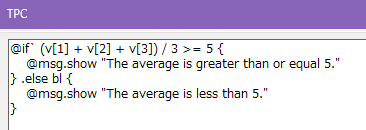
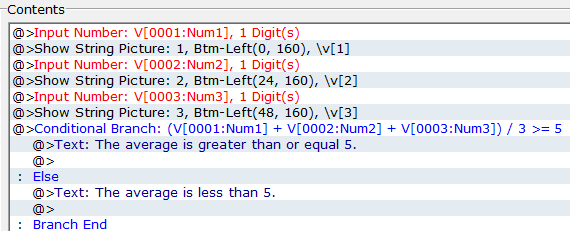
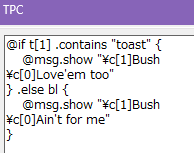
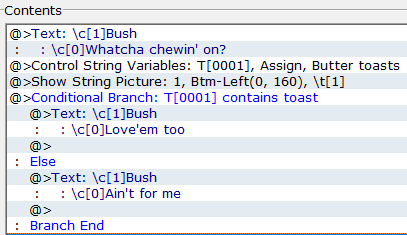
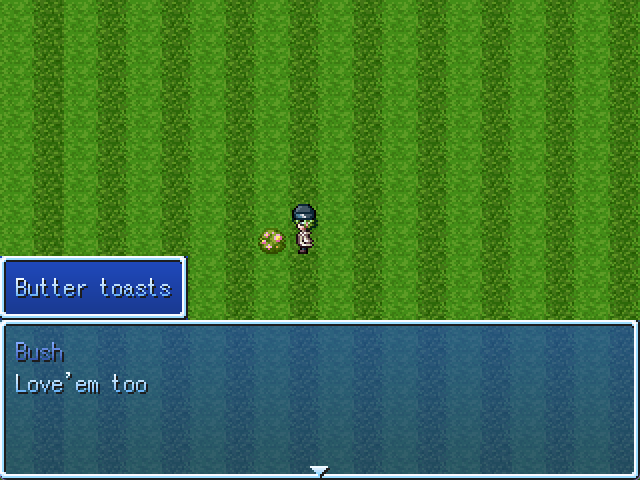
Alright, but what if we want to somehow compare the string variables added in this update? The author, of course, didn’t forget about the new features and gave us 4 more operators:
- .eq „text” / t[number] – check if the variable is the same as the given text or other variable number
- .neq „text” / t[number] – checking if the variable is different from the given text or other variable number
- .contains „text” / t[number] – check if the variable contains the given text or another variable number
- .notContains „text” / t[number] – check if the variable does not contain the given text or other variable number
Add Move Route
The name sounds familiar, how does this actually differ from Set Move Route? The key difference is that instead of setting an entirely new path for an event, Add Move Route adds movement to the current path. This makes it a fantastic tool for dynamically generating event routes.
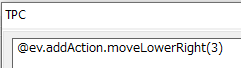
The usage is very simple: you type @ev.addAction into TPC, and then specify the movement that the event should plan:
- .moveUp(X) – X steps up
- .moveRight(X) – X steps to the right
- .moveDown(X) – X steps down
- .moveLeft(X) – X steps to the left
- .moveUpperRight(X) – X steps up to the right
- .moveLowerRight(X) – X steps down to the right
- .moveUpperLeft(X) – X steps up to the left
- .moveLowerLeft(X) – X steps down to the left
- .moveRandom(X) – X steps in a random direction
- .moveToward(X) – X steps toward the hero
- .moveAway(X) – X steps away from the hero
- .moveForward(X) – X steps forward
- .move(X, K)
-
- where X is the number of steps and K is the direction (2 – down, 4 – left, 6 – right, 8 – up)
-
- .faceUp – turn up
- .faceRight – turn right
- .faceDown – turn down
- .faceLeft – turn left
- .turnRight – turn 90 degrees to the right
- .turnLeft – turn 90 degrees to the left
- .turnBack – backward rotation
- .turnSide – random rotation of 90 degrees to the left or right
- .turnRandom – random turn
- .turnToward – turn towards the player
- .turnAway – turn away from the player
- .face(K) – turn in a given direction
- where K is the direction (2 – down, 4 – left, 6 – right, 8 – up)
- .pause – waits
- .beginJump – start the jump
- .endJump – end of jump
- .fixDir – blocks rotation
- .unfixDir – unblocks rotation
- .speed(X) – sets the speed of movement
- X – the speed value shown in the editor, in the range of 1 – 6
- .freq(X) – sets the frequency of movement
- X – frequency value visible in the editor, in the range 1 – 8
- .trans(X) – sets event transparency
- X – value range 1 – 8
- .switch(ID, V) – sets the switch
- ID – ID of the switch
- V – its value (1 – ON, 0 – OFF)
- .setBody(„FILE”, idx) – changes the graphic of the event
- .se(„FILE”, VOL, PITCH, BALANCE) – plays a sound with given parameters
- FILE – name of the sound
- VOL – volume in the range 0 – 100
- PITCH – tempo in the range 0 – 150
- BALANCE – direction from which the sound is coming, in the range 0 – 100
- .beginThrough – turns on passing through walls and events
- .endThrough – turns off passing through walls and events
- .pauseAnim – turns off animation during movement
- .resumeAnim – turns on animation during movement
Note that Add Move Route can only add one movement per command. To add more movements, simply stack multiple AMR commands one after the other. Another thing to note is that if AMR is called while the event isn’t following any path, the command will be ignored. If you want to prepare an entire path from scratch, you can cleverly work around this by first inserting an empty Set Move Route command.

Changing the resolution
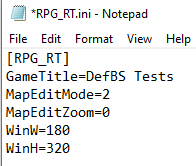
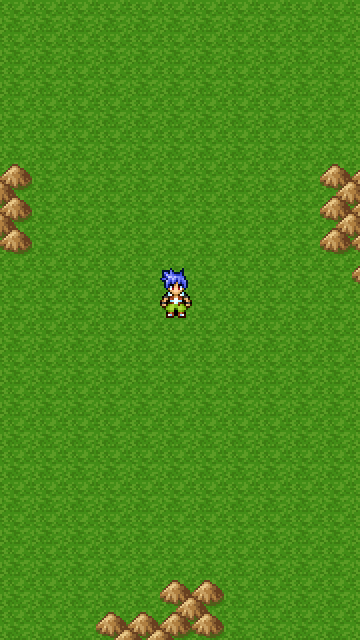
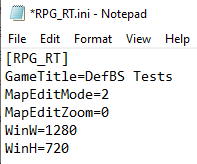
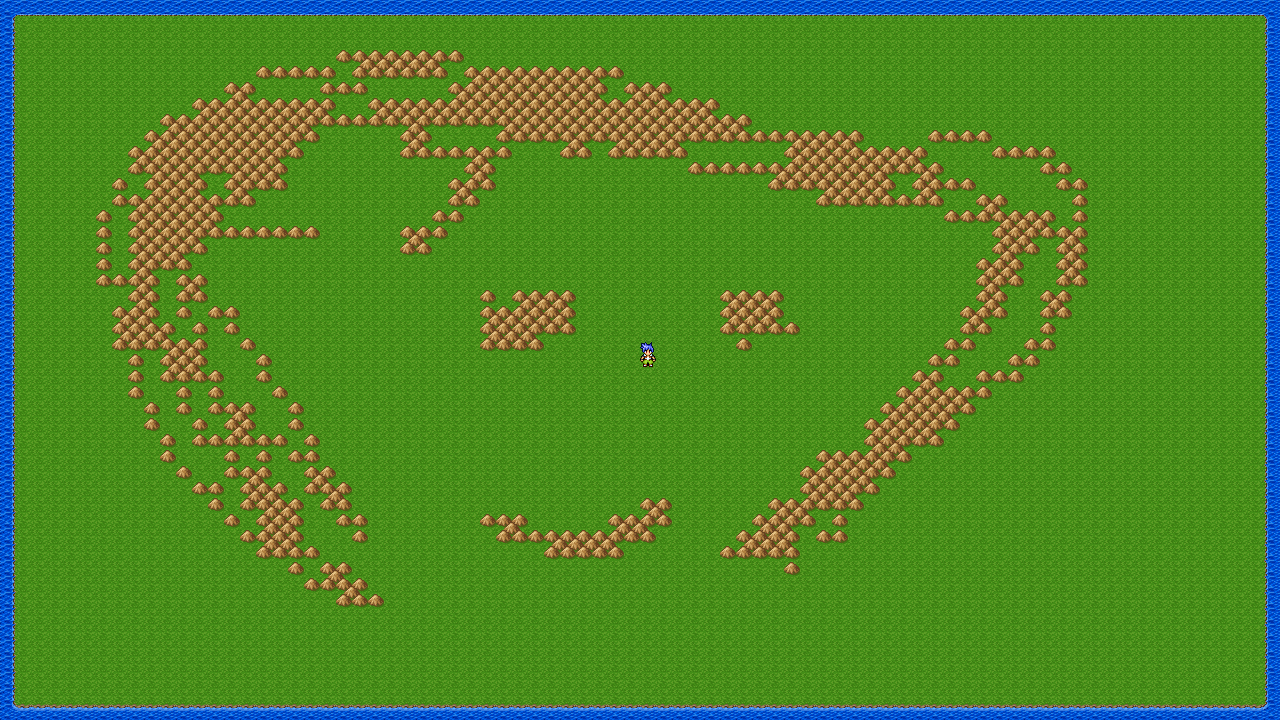
And you can set it to any resolution, from vertical ones mimicking mobile games to HD+! To change the resolution, open the RPG_RT.ini file located in the game folder, and at the very bottom, add the following lines:
- WinW=X, where X is the width of the game window in pixels
- WinH=X, where X is the height of the game window in pixels
Calling system functions
The process of opening built-in windows (such as menus, save screens, etc.) has been streamlined. Additionally, the ability to open several other existing windows has been added. This is done using @sys.call, followed by the desired function to call:
- .saveMenu – opens the save window;
- .loadMenu – opens the load window;
- .partyMenu – opens the party menu;
- .optionMenu – opens the graphical options menu available under F6;
- .licenseMenu – opens the license menu;
- .debugMenu – opens the debugger available under F9;
- .toggleFullscreen – toggles between windowed and fullscreen mode;
- .f12 – restarts the game.
If for some reason you want to block the ability to open a particular window – nothing simpler, follow the same procedure and just change @sys.call to @sys.limitation.
BingShan wouldn’t be himself if he didn’t sprinkle in a handful of new features. A few interesting system functions have been added:
- @sys.getInfo.mapSize.dst v[number] – retrieves the width and height of the map (in tiles) and puts them in the number and vnumber+1 variables, respectively.
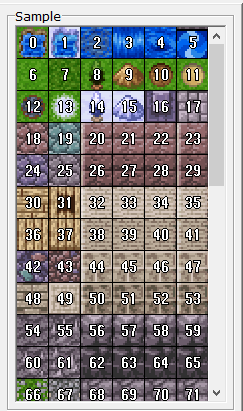
- @sys.getInfo.tiles X, Y, W, H .lower/.upper .dst v[number] – gets the tile area of the map with dimensions W by H, with the upper left corner at a point with coordinates X and Y. If we want to get tile information from the lower layer, we use .lower. If from the upper- .upper. Tile ID information starts with the variable number. The assignment of IDs to tiles can be found in the Rewrite Map command window:
- @sys.getInfo.winSize.dst v[number] – takes the unscaled width and height of the game window (in pixels) and puts them in the variables number and number+1, respectively.
- @sys.getInfo.pixel X, Y, W, H .dst v[number] – an option analogous to the one from the image operation: it retrieves information about the color of pixels in the area of dimensions W by H with the beginning at a point with coordinates X and Y. The data is placed in variables starting from number.
- @sys.gameOpt.mouse.disableMsgProcession(X) – toggles the message window operation with the mouse: LMB – OK, RMB – Cancel. Inserting 0 after X disables and 1 enables this option.
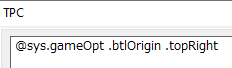
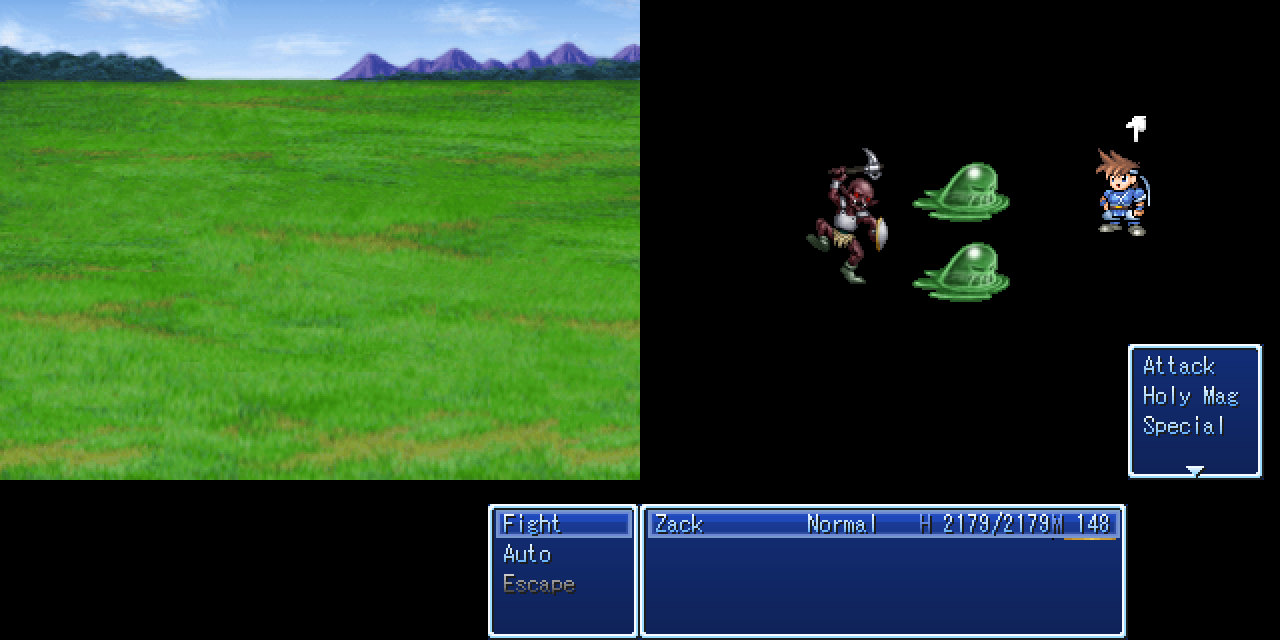
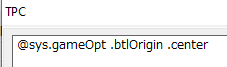
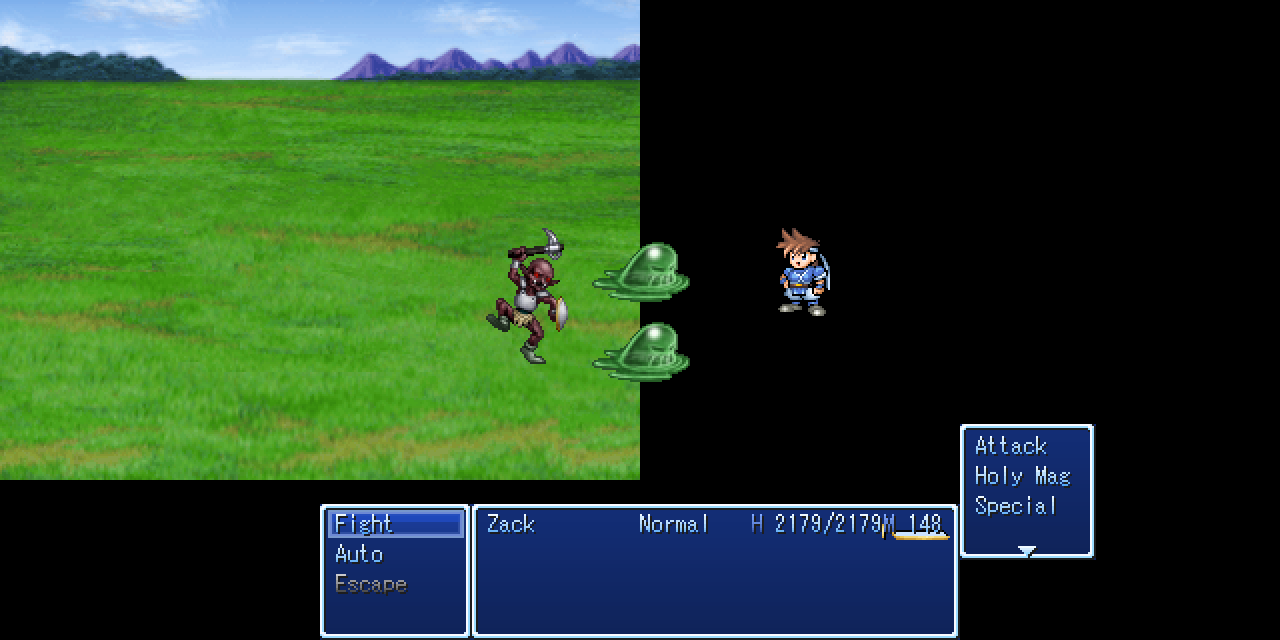
- @sys.gameOpt.btlOrigin – sets the position of the battle on the screen in the default battle system. When using the default resolution, the option does not change anything, its effect is seen only in higher than 320×240. There are several location operators:
- .topLeft – top left corner
- .top – top middle
- .topRight – top right corner
- .left – left of center
- .center – the very center
- .right – right of center
- .bottomLeft – bottom left corner
- .bottom – bottom middle
- .bottomRight – bottom right corner
For Each loop
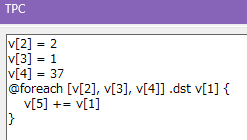
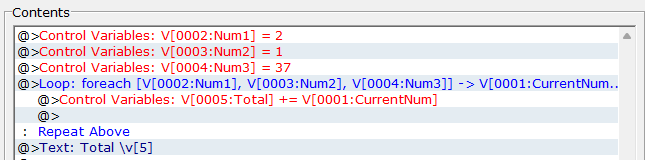
A small, yet welcome addition to the current loops. For Each goes through each entry in a given array sequentially, allowing actions to be performed on the current element. The elements of the array can be not just regular numbers (1, 2, 3…) but also numeric variables (\v[1], \v[2]…). Currently, it does not support text variables.
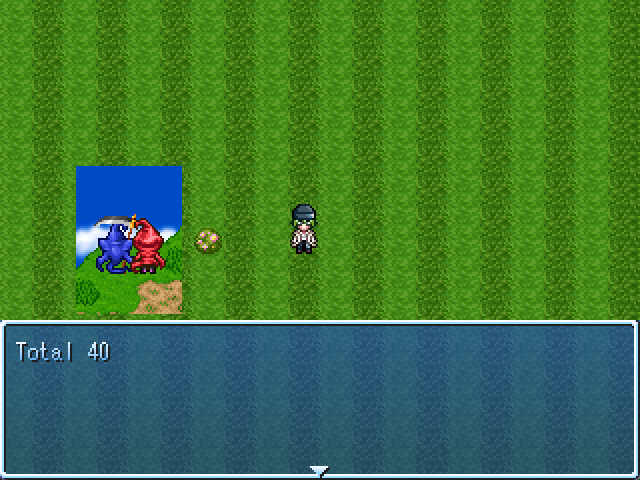
- @foreach TABLE .dst v[currentElement] – where currentElement is the variable into which the value of the current element of the loop goes.
Greater customization of built-in commands
In addition to inserting new commands, TPC allows for editing those already added. This way, you can parameterize things that were not previously possible to control with variables. Thanks to this, you’ll be able to set things via a variable, including:
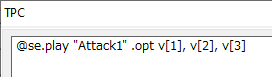
- volume/tempo/balance of sounds or music, and play a file with a name contained in a string variable
- the event to perform Move Route (!)
- the opponent in Battle Events on which the command will be executed
…and much more (although not all yet), so I encourage you to experiment.

Minor updates/changes too small for a separate paragraph
- @shop.goods v[number], v[otherNumber]
- open a shop containing items with IDs ranging from number to otherNumber
- @break .level N
- intended to be used in nested loops – break out of the Nth level loop
- @continue
- intended to be used in loops, it skips the current loop execution and goes immediately to the next one
- @save[ID].getInfo .name t[number]
- extracts the first character’s name from save ID into the string variable number
Axer
The original article has been translated by Michu and edited by Axer.

Specjalistyczny, szczegółowy i profesjonalny artykuł 🙂
I changed my game resolution to 480×270 so it fits most of modern monitor (16:9). Thing is when I launch the game in fullscreen it has this annoying black bar around it. How do I get rid of it?
There isn’t any low resolution that will completely fill every monitor resolution in fullscreen. You will either get black bars or blurred and stretched image if you forcibly resize it.
480x270px screen scaled up 2x will give you 960x540px resolution. Scaled up 3x will give you 1440x810px resolution. None of which will completely fill either 1080p or 1440p monitors. Both of them have 16:9 aspect ratio, yes, but it’s the raw pixels that counts.
You need to experiment with different base resolutions to find something that will have the least black bars around in fullscreen, but like I said, there’s no one perfect solution for this. In fact this is a quite hard problem to solve.
Sorry, 480x270px will work on 1080p monitor (and 4K monitor, since it’s made out of 4 1080p screens) if you scale it up 4x, but it will have black bars on 1440p monitor.
Thank you for this great introduction to TPC! Doing the lord’s for writing RM2k3 content in 2025.
I’ve been using maniacs patch for months now and just realised my „Control String Variables” button doesn’t open anything or do anything! 🙁